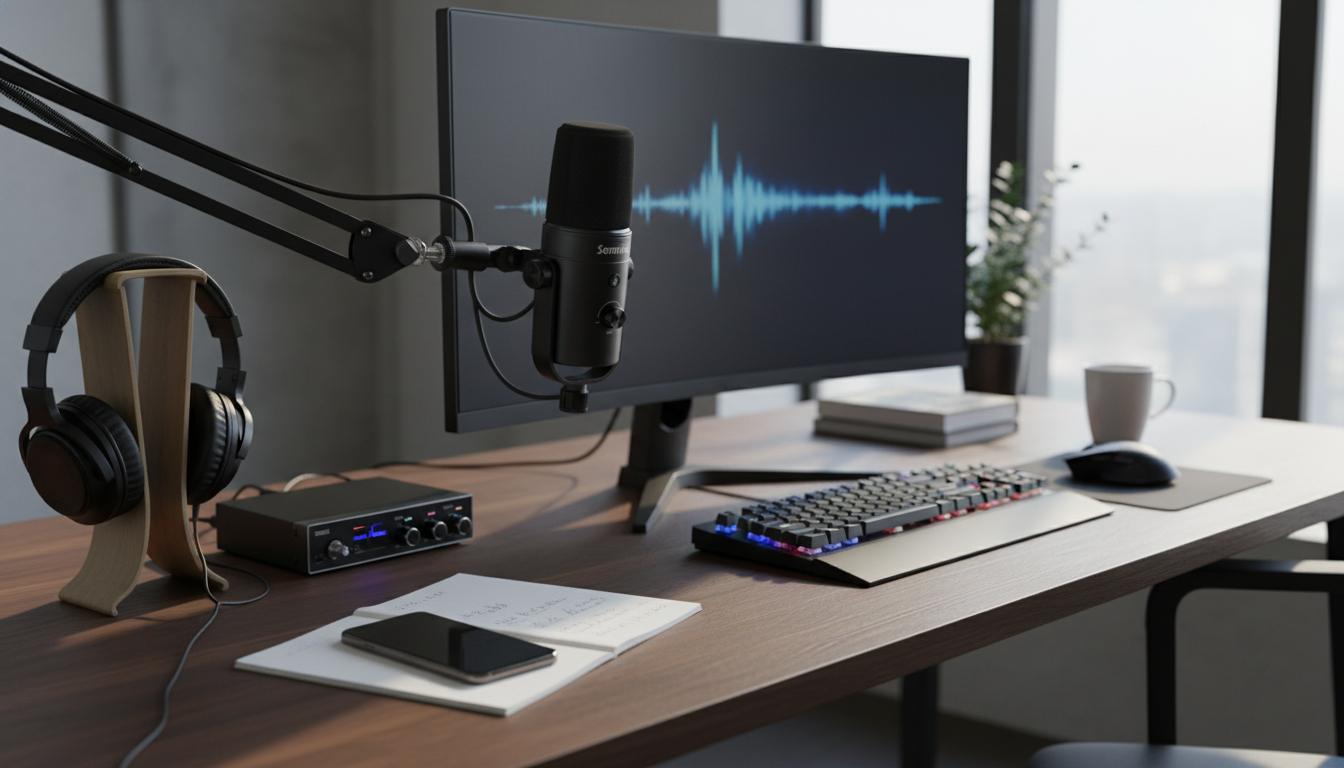
A dynamic microphone can deliver a focused, broadcast-style voice sound while keeping room noise and keyboard clicks under control. This guide breaks down what to look for, how to set it up, and how to get consistent results for streaming, podcasting, and studio sessions. For more guidance, see Top 5 Dynamic Microphone Brands – Atlanta Institute of Music.
Dynamic microphones are a go-to for voice-driven content because they’re built to handle real-world environments. Compared with many condenser models, a dynamic mic is typically less sensitive to distant sounds, which helps when your “studio” is a desk in a bedroom or a shared office. For further reading, see Large Diaphragm Condensor vs. Dynamic Microphones – Sovas.
If you want a deeper overview of mic technique fundamentals, Shure’s learning hub is a solid starting point: Shure Educational Articles.
A dynamic mic earns its keep across multiple workflows, especially when consistency matters more than capturing every last detail of the room.
For creators recording in small, reflective spaces, the biggest upgrade usually comes from getting closer to the mic (not cranking gain) and controlling plosives and vibrations. If you’re interested in broader audio standards and research, the Audio Engineering Society is an authoritative reference point.
Small adjustments in placement and gain staging can make a dynamic microphone sound dramatically more expensive.
A practical baseline: speak at your “on-stream” volume, keep your mouth-to-mic distance consistent, and adjust gain so excited moments still have headroom. If you keep chasing volume after the fact, you’ll often boost hiss and room tone along with your voice.
Dynamic microphones typically need more clean gain than condensers. That doesn’t mean they’re “quiet” by design—it means the system around the mic (interface preamps, cables, OS settings, and monitoring) matters.
| Issue | Likely cause | Fast fix |
|---|---|---|
| Low volume | Not enough preamp gain | Increase interface gain; move closer; consider an in-line booster |
| Boomy sound | Too much proximity effect | Back off 1–2 inches; engage high-pass filter; reduce 100–200 Hz slightly |
| Plosives (P/B pops) | Direct airflow hitting capsule | Use pop filter; speak across the mic at a slight angle |
| Room echo | Mic too far away / reflective space | Move closer; add soft furnishings; lower input gain to allow closer placement |
| Hum or buzz | Ground/power interference | Swap cable; move away from power supplies; try different USB port/interface power |
One more easy win: keep your mic cable and interface away from laptop chargers and power strips. If a buzz appears only when a light or fan turns on, you’re likely dealing with electrical interference rather than the mic itself.
Processing should support your voice, not replace good mic placement. Start subtle, then increase only if it truly improves clarity and consistency.
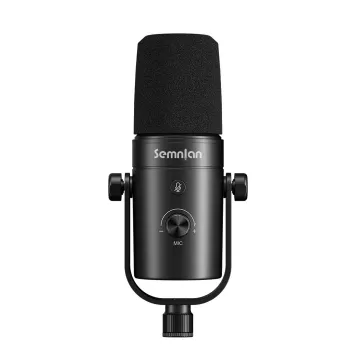
Shop the featured mic here:
Professional Dynamic Microphone for Streaming, Podcasting & Studio Recording.
If you prefer a plug-and-play computer setup, you may also want to compare it with:
USB Gaming Microphone Kit with Arm Stand.
Often, yes—dynamic mics typically pick up less room sound and perform well very close to the mouth, which helps keep your voice front and center. Placement, distance, and clean gain from your interface still make a big difference.
Many dynamic microphones need more preamp gain than condensers or headset mics, and they’ll sound quiet if you’re too far from the capsule. Move closer, set levels so speech peaks around -12 dB to -6 dB, and consider an in-line booster if your interface gets noisy at high gain.
Yes, in most setups it still helps—plosives can overload a dynamic mic just like any other mic. Use a pop filter or windscreen and speak slightly across the mic (off-axis) to reduce bursts of air.


Leave a comment